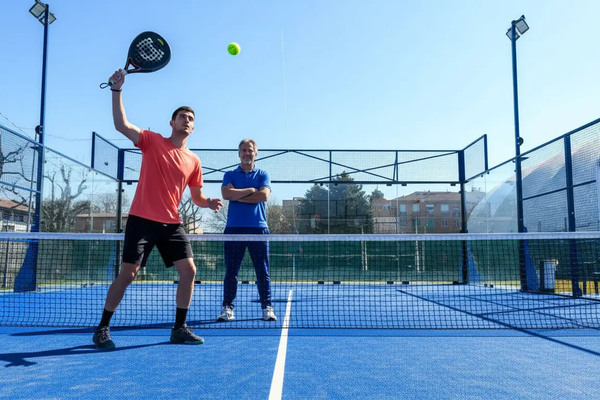
Bandeja drills are how the shot actually becomes reliable, since the bandeja depends on timing and control that's genuinely difficult to build through match play alone. It's one of padel's signature shots — a controlled, defensive overhead that lets you handle a lob without giving up your net position — and like most technical shots, it improves fastest with focused, repeatable practice rather than just hoping it clicks during a game.
This guide covers a progression of bandeja drills for beginners and intermediate players, from isolated technique work to more realistic, pressured practice.
A Quick Reminder of What the Bandeja Is
The bandeja is a controlled overhead shot used against a lob, hit with less pace than a full smash and designed to keep your team at the net rather than forcing a risky, all-out attempt to end the point. Unlike a smash, which tries to finish the point outright, the bandeja prioritizes consistency and court positioning, usually landing deep with a moderate, controlled trajectory.
How the Bandeja Fits Into Overall Net Strategy
Holding the net is one of the biggest advantages a team can have in padel, and the bandeja exists specifically to protect that advantage against lobs rather than forcing a team to retreat every time the ball goes up. Drilling the shot in isolation only pays off if you also understand its role in the bigger picture — it's a tool for staying in an advantageous position, not just a way to return a difficult ball.
Why Dedicated Drills Matter for This Shot
The bandeja combines several moving parts at once — reading the lob's height and speed, timing your overhead swing, and choosing a controlled rather than aggressive shot — which makes it hard to develop reliably just by playing points. Isolating each part in a drill setting lets you build consistency before adding the pressure and unpredictability of a real match.
Beginner Bandeja Drills
These three drills isolate the swing, the contact, and the footwork so you can build each piece before combining them under pressure.
Shadow Swing Drill
Without a ball, practice the overhead motion slowly, focusing on a compact, controlled swing rather than a full smash-style windup. This builds the basic movement pattern and helps you feel the difference between a bandeja's restrained swing and a smash's more aggressive one.
Fed Overhead From Short Distance
Have a partner or coach toss or feed easy lobs from a short distance while you practice hitting controlled bandejas back to a general target area, without worrying about precise placement yet. The goal here is simply making clean, consistent contact with the reduced-pace swing.
Footwork-Only Positioning Drill
Have a partner call out random directions or toss balls to different spots while you practice getting into position for an overhead shot, without actually hitting yet. This isolates the movement and positioning piece, which is often what breaks down first when players try to add pace or pressure too quickly.
| Drill | Skill Focus | Level |
|---|---|---|
| Shadow swing drill | Compact overhead motion | Beginner |
| Fed overhead, short distance | Clean contact, basic timing | Beginner |
| Footwork-only positioning | Getting under the ball quickly | Beginner |
| Target zone bandeja | Depth and placement control | Intermediate |
| Bandeja-to-net transition | Combining the shot with net recovery | Intermediate |
| Live-point bandeja pressure drill | Decision-making under match conditions | Intermediate |
Intermediate Bandeja Drills
Once the basic motion feels natural, these drills add placement, transition, and pressure so you can bring the bandeja closer to match conditions.
Target Zone Bandeja
Set up markers or cones in the back third of the court and practice landing your bandeja consistently within that zone, using fed lobs of varying height and pace. This builds the depth control that separates a genuinely useful bandeja from one that simply gets the ball back without any real purpose.
Bandeja-to-Net Transition
After hitting the bandeja, immediately practice moving back into your net position rather than standing still to admire the shot. This drill reinforces the habit of using the bandeja as part of a broader net-holding strategy, not as an isolated shot disconnected from what happens next.
Live-Point Pressure Drill
Play short, competitive points that specifically start with a lob, forcing you to make real decisions about when to use a bandeja versus a smash or a different response, under actual match-like pressure. This is the final step in bridging isolated technique work with the split-second decision-making a real game demands.
Common Issues These Drills Help Fix
These same drills also help fix three specific problems that come up often — here’s how each one shows up on court.
Overhitting Instead of Controlling
Many players default to smashing every lob at full power, even when a controlled bandeja would be the smarter choice for holding the net. Drills that specifically remove the temptation to go for a winner help build the restraint the shot requires.
Poor Footwork Under the Ball
Struggling to get properly positioned under a lob, rather than reaching or stretching awkwardly, is one of the most common technical breakdowns. The footwork-only positioning drill directly targets this issue before adding the complexity of an actual swing.
Standing Still After Contact
Hitting a clean bandeja and then failing to move back into position leaves your team vulnerable on the very next shot. The transition drill specifically builds the habit of continuing to move after contact, rather than treating the shot as the end of the sequence.
Structuring a Bandeja Practice Session
A reasonable session might start with five to ten minutes of shadow swings and footwork, move into fed overhead repetitions focused on clean contact, progress to target zone practice for placement, and finish with live-point pressure drills to tie everything together. Repeating this structure regularly builds both the mechanics and the decision-making the bandeja actually requires in a match.
Practicing With a Partner vs Practicing Alone
Some early bandeja work, like shadow swings, can be done entirely alone, but most of the drills above need a partner or coach to feed lobs consistently. If you're working on this shot without regular access to a coach, pairing up with a partner who's also trying to improve their overhead game — and taking turns feeding for each other — is a practical way to get the repetitions in without needing formal lessons every session.
Bandeja Drills Quick Checklist
- Start with shadow swings to build the compact overhead motion.
- Practice clean contact with easy, fed lobs before adding pace or variety.
- Isolate footwork and positioning separately from the swing itself.
- Use target zones to build consistent depth and placement.
- Practice transitioning back to the net immediately after the shot.
- Finish with live-point drills to build real decision-making under pressure.
The bandeja rewards patient, structured practice far more than trying to force it during competitive points. Work through these drills in order, and the shot goes from something you're unsure about to a dependable part of your net game.